
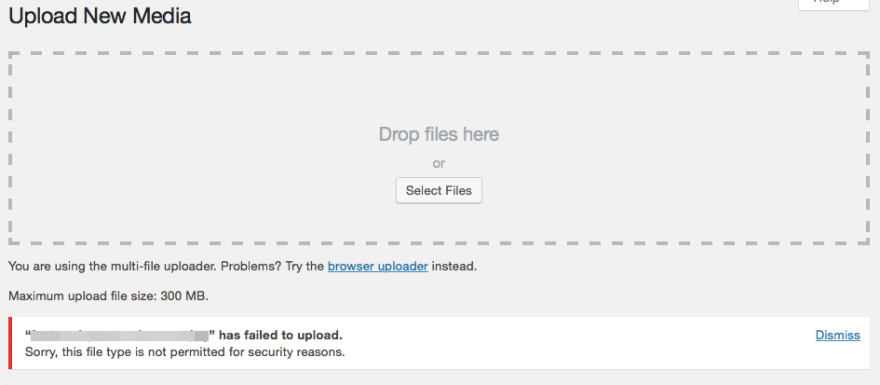
If you’ve tried to upload a file to your media library and received the “Sorry, this file type is not permitted for security reasons” error, you may feel stumped as to how to proceed. Fortunately, there are several ways to fix the error, and get things back to normal.
In this article, we’ll explain why the “Sorry, this file type is not permitted for security reasons” error exists in WordPress. Then, we’ll show you five ways to solve the error and upload any file to your WordPress site.
Understanding the “Sorry, This File Type Is Not Permitted for Security Reasons” Error in WordPress
The reason behind this WordPress error is much more straightforward than it might seem. You may not know it, but WordPress has restrictions on the types of files you can upload. The “Sorry, this file type is not permitted for security reasons” error appears when you try to upload a prohibited file type.
The reason behind these restrictions is to prevent security issues due to file uploading vulnerabilities. The accidental or purposeful upload of malicious executable files could do permanent damage to your site. Others can give hackers access to your site or your server.
However, while this error prevents you from uploading files to your site, it also does so for your users. Without any “roadblocks”, practically anything could be uploaded to your site, which of course poses a great risk.
In a nutshell, the “Sorry, this file type is not permitted for security reasons” error is in place to protect your site and certainly isn’t the worst WordPress error you could encounter. Even so, if you have to upload a prohibited file type, this well-meaning error still presents a problem.
How to Fix the “Sorry, This File Type Is Not Permitted for Security Reasons” Error in WordPress (4 Methods)
When it comes to this particular error, you have a variety of options for how to deal with it. Depending on your situation, one of the methods listed below should provide a simple solution.
However, some hosting providers limit the file types you can upload too. If yours is one of them, the methods we’ve listed below won’t solve the error. In these cases, contacting your hosting provider should be your first port of call. They should be able to help you solve the situation.
1. Add Permitted File Types by Changing WordPress Multisite Settings
WordPress Multisite enables you to create a network of websites with a single WordPress installation. For example, it’s handy if you want to enable users to create their own blogs, or if you’re an international company and want to use sub domains to create country-specific sites that can be updated simultaneously.
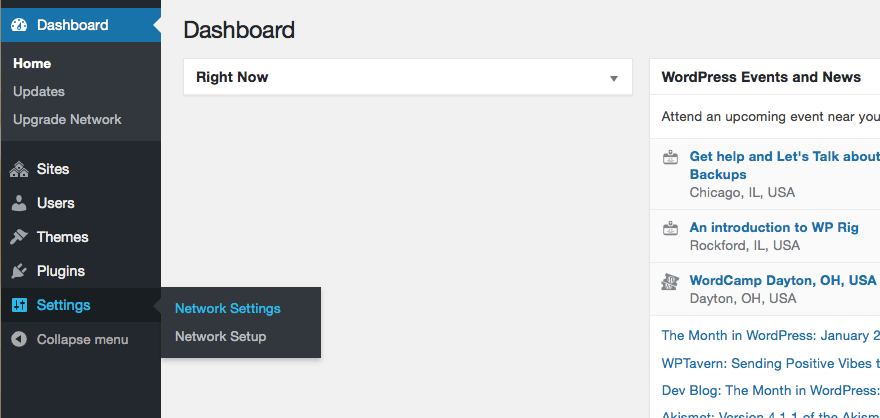
Unlike single-site WordPress installations, Multisite has a setting to enables you to easily allow for file uploads not normally permitted by WordPress. To access it, navigate to Network Settings under Settings in the Network Admin dashboard:
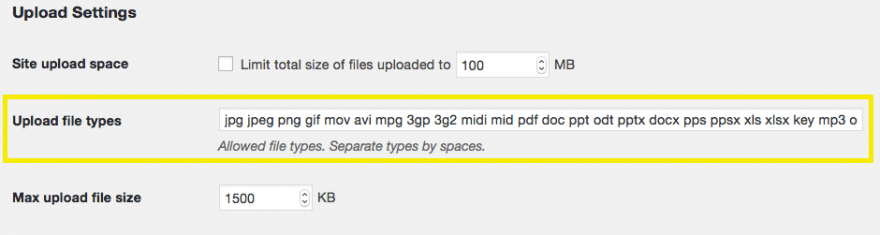
Beneath the Upload Settings heading, you’ll find the Upload file types setting where you can add the extensions for the file types you wish to permit.
2. Modify Approved File Types Using a Plugin
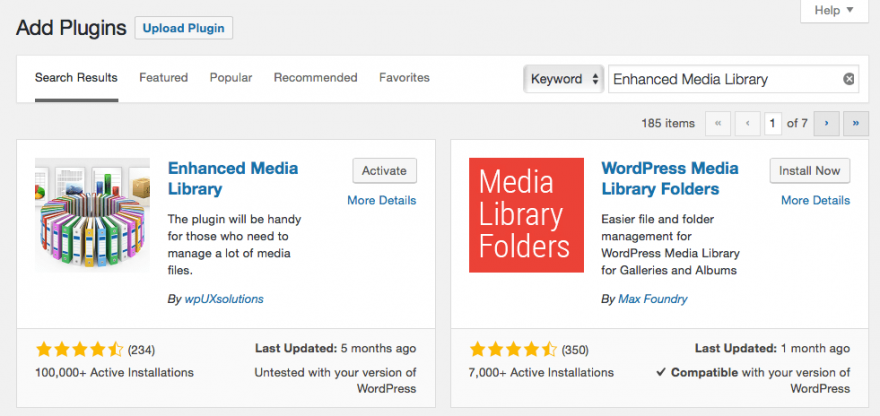
There are several plugins capable of enabling you to upload prohibited file types, such as File Manager and Enhanced Media Library. These plugins have settings to enable you to add permitted Multipurpose Internet Mail Extensions (MIME) types for upload to WordPress.
A MIME type describes the content a file contains, and tells your browser how to display it correctly. For example, the file extension .jpg corresponds with the MIME type image/jpeg, and displays as an image in web browsers.
We’ll use the Enhanced Media Library plugin to add new permitted MIME types for upload. You can quickly install and activate the plugin within the Plugins area of WordPress:
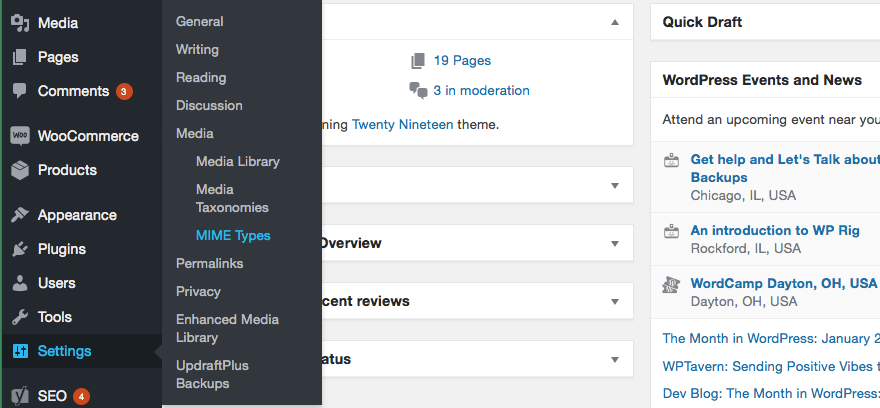
With the plugin activated, we’ll go to our settings and see that there’s a MIME Types > Media option:
There are two ways to permit uploads for a specific MIME type. The first is to simply select the box corresponding to the desired MIME type in the Allow Upload column. However, if your desired type is not listed, you’ll have to select Add New MIME Type at the top of the page.
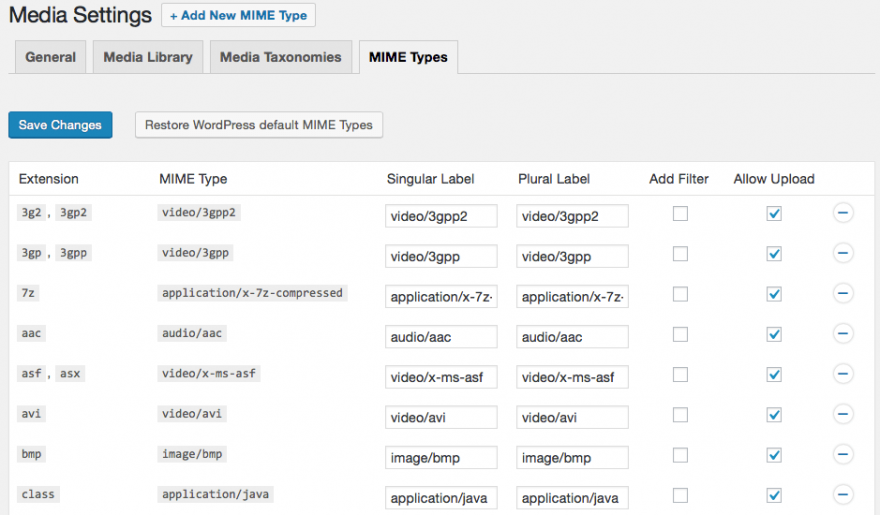
This will add a new row where you can enter the extension, MIME type, and labels. Next, select the Allow Uploadbox for the new MIME type. If you ever change your mind, you can remove entries by using the button at the end of each row, or select Restore WordPress default MIME Types for the original settings.
3. Use the Upload_Mimes Filter by Editing Your Theme’s functions.php File
You can instead change your site’s permitted MIME types manually. To do so, you’ll need to access your theme’s functions.php file and utilize a WordPress function known as a ‘filter’.
The functions.php file defines the behaviors, or functions, of your WordPress site. In WordPress, you can use filters to modify the platform’s default functions. By adding the upload_mimes filter to functions.php, you’ll be changing WordPress’s default behavior when you attempt to upload a prohibited file type.
To start, back up your site, which ensures that if something goes wrong while you’re editing important site files, you have a way to restore it. Then, you’ll need to access your functions.php file via FTP using an FTP client such as FileZilla.
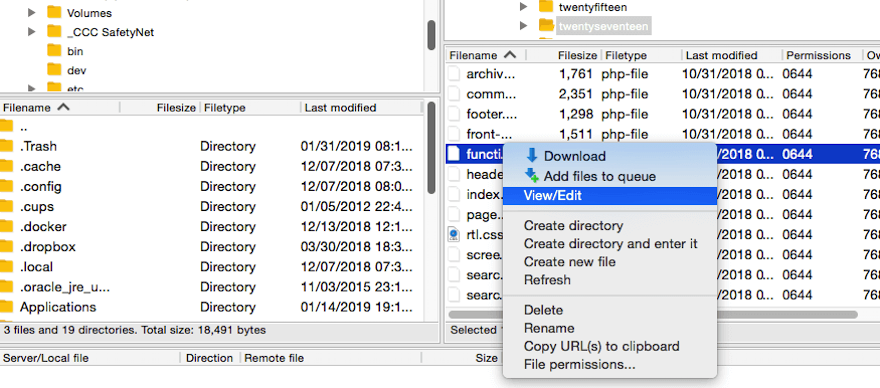
Once you’ve connected to your site’s server, you can find your functions.php file inside your theme’s folder located in the wp-content directory. Right-click on the file and select View/Edit.
The file will open in your text editor, where you can add the following code:Add your desired MIME types and their corresponding extensions to the array. You can also add MIME types you wish to prohibit to the optional Remove a mime type section, or delete it if it’s not applicable.
function my_custom_mime_types( $mimes ) {
// New allowed mime types.
$mimes['svg'] = 'image/svg+xml';
$mimes['svgz'] = 'image/svg+xml';
$mimes['doc'] = 'application/msword';

// Optional. Remove a mime type.
unset( $mimes['exe'] );
return $mimes;
}
add_filter( 'upload_mimes', 'my_custom_mime_types' );
This method enables you to specify which MIME types you want to allow, so you still have control over what’s uploaded to your site to help prevent file upload vulnerabilities. Make sure to save your changes when you’ve finished editing.
4. Allow Unfiltered Uploads in Your wp-config.php File
If you want to allow all file types for upload, you can do so by editing wp-config.php – the file that contains information pertaining to your site’s database. Once again, you’ll want to back up your site in case something goes wrong when you’re editing.
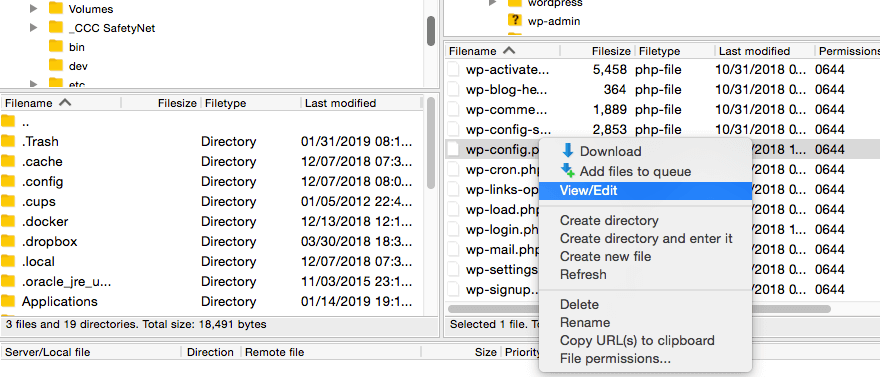
Then you’ll access wp-config.php using FTP as we described in the previous method. The file should be located in the root directory of your website. Select View/Edit to open the text editor.
You can add the following code to the file, anywhere above the line reading
“/* That’s all, stop editing. Happy blogging. */”:
define('ALLOW_UNFILTERED_UPLOADS', true);
Save your changes when you’ve finished editing. Note that doing this means nothing will prevent you or users from accidentally (or purposefully) uploading malicious files to your site, so it may be wise to try other options before resorting to this one.
Conclusion
WordPress errors can cause setbacks when you’re making changes to your site. However, when it comes to the Sorry, this file type is not permitted for security reasons error, there are several solutions available to let you to upload files WordPress doesn’t allow by default.
In this article, we’ve discussed what causes this error in WordPress and why it exists. Then we provided four possible solutions for fixing the error:
- Add permitted file types by changing WordPress Multisite settings.
- Modify approved file types using a plugin.
- Use the upload_mimes filter by editing your theme’s functions.php file.
- Allow unfiltered uploads in your wp-config.php file.
Do you have questions about the “Sorry, this file type is not permitted for security reasons error in WordPress?” Let us know in the comments section below!
Ah brother you have saved my life! Thank you 🙂
Welcome 🙂
This was a great tutorial and helped me fix my problem.
Thank you for saving my time.
You are Most welcome